VR Driving Simulator & in-car interfaces for AVs

Duration
Jan 2022 - 2023
Project Members
2. 1 Designer
3. 1 PhD Student
4. Dr. Bruce Walker
Role
Skills Learned
C#
Design for AVs
Background
Autmonous Vehicle technology is an active area of research in the Sonification lab at Georgia Tech. Headed by Dr. Walker and his PhD students, the lab is involved in numerous projects within the space. The lab has 2 self-driving simulators that it uses for user-testing. Both simulators, currently, involve 3-4 monitor setups along with steering wheels, gears, clutch, accelerators and HMIs. The simulators are able to emulate the behavior of a self-driving car in a city environment.
I'm part of 2 projects in this space:
- VR driving sim development - In this project, we're looking to subsitute the monitor setup with a head mounted display for a more immersive user experience and more precise test results. Our aim is to simulate a comprehensive in-car experience based off research findings from other projects, and use the setup for comprehensive user testing.
- In-car interface design - This project is aimed at designing and developing HTML/React based interfaces which I will later integrate with the VR driving simulator for user testing. These interfaces can also be integrated with the existing driving simulator setup for user testing, until the VR driving sim is complete. I have been researching the different ways in which personalization of the in-car experience can help in boosting the users' sense of trust, control, and identity. We're in the process of designing the first iteration of these interfaces, which we will later integrate with a VR-based self-driving simulator (using Unity) for user testing.
VR Driving Simulator

As part of the VR Development, I'm assisting another developer in getting a VR environment up and running. My role, at this point, is primarily to become familiar with the VR setup, in order to be able to integrate the in-car interfaces that I will be designing in the other project.
We are currently testing our driving simulator with the Oculus Quest 2 and HTC Vive Pro. For VR implementation, we have chosen to build upon the existing Vehicle Physics Pro advanced simulation kit.
It covers all the feautres we need for vehicle simulation:
- Free edition includes 2 models (truck, car) and 2 scenes (experimental, city scape)
- Built-in telemetry displayed with on-screen UI (can be toggled)
- Lot of extensions and advanced features (ABS, cruise control, steering assist, etc.)
- Claims to be efficient even on mobile (relevant for all-in-one VR headsets)
I'm currently working on connecting the different input controllers in our lab (primarily the steering wheel), while the other developer has taken the lead on fleshing out the VR experience (reducing motion sickness through motion blur/vignettes, adjusting the mirror reflection).
Once I have developed the HTML/React based interfaces that we design in the other project, I will be taking the lead on its VR implementation.
In-car Interface Design
Phase 1: Understanding the Space
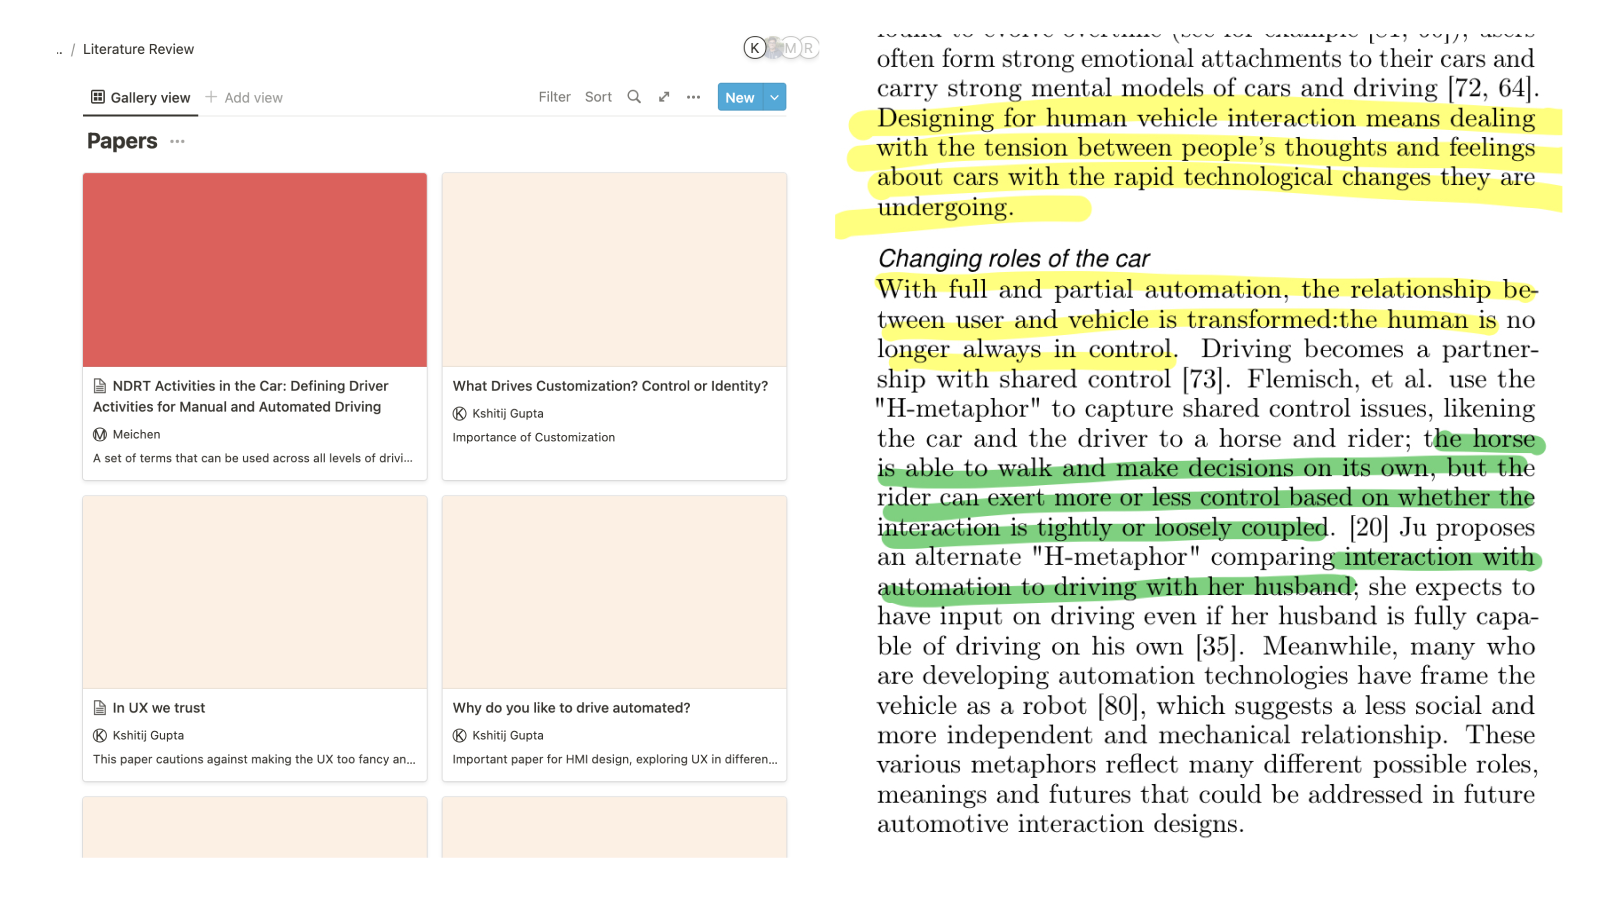
Since I had some background on AV technology, I took the lead on exploring in depth the research that has been ongoing in this space. It was quite exciting to read about the different experiments and their findings. By making a concise list of relevant findings, I'm trying to ensure that our design builds upon existing research as much as possible.
Since we've been informed by our advisors that user interviews aren't of much use in this stage, I realize that our design completely relies on findings from elaborate experiments. Keeping that in mind, I'm reading literature no matter what phase we are in. The focus of the literature, however, has varied from broad topics such as why customization is important to the SAE guidelines for designing in-vehicle displays.
I've created a Notion board to maintain a track of different research work, along with my summary of each paper. This is to ensure the rest of the team is up to date.

Phase 2: Ideation
To get started with our design process, we organized 2 brainstorming sessions:
- Individual brainstorming
- Group brainstorming
Individual Brainstorming
Each of us generated a set of ideas which we could later bring up during the group brainstorming session. I was able to generate 11 ideas and 1 rough concept.
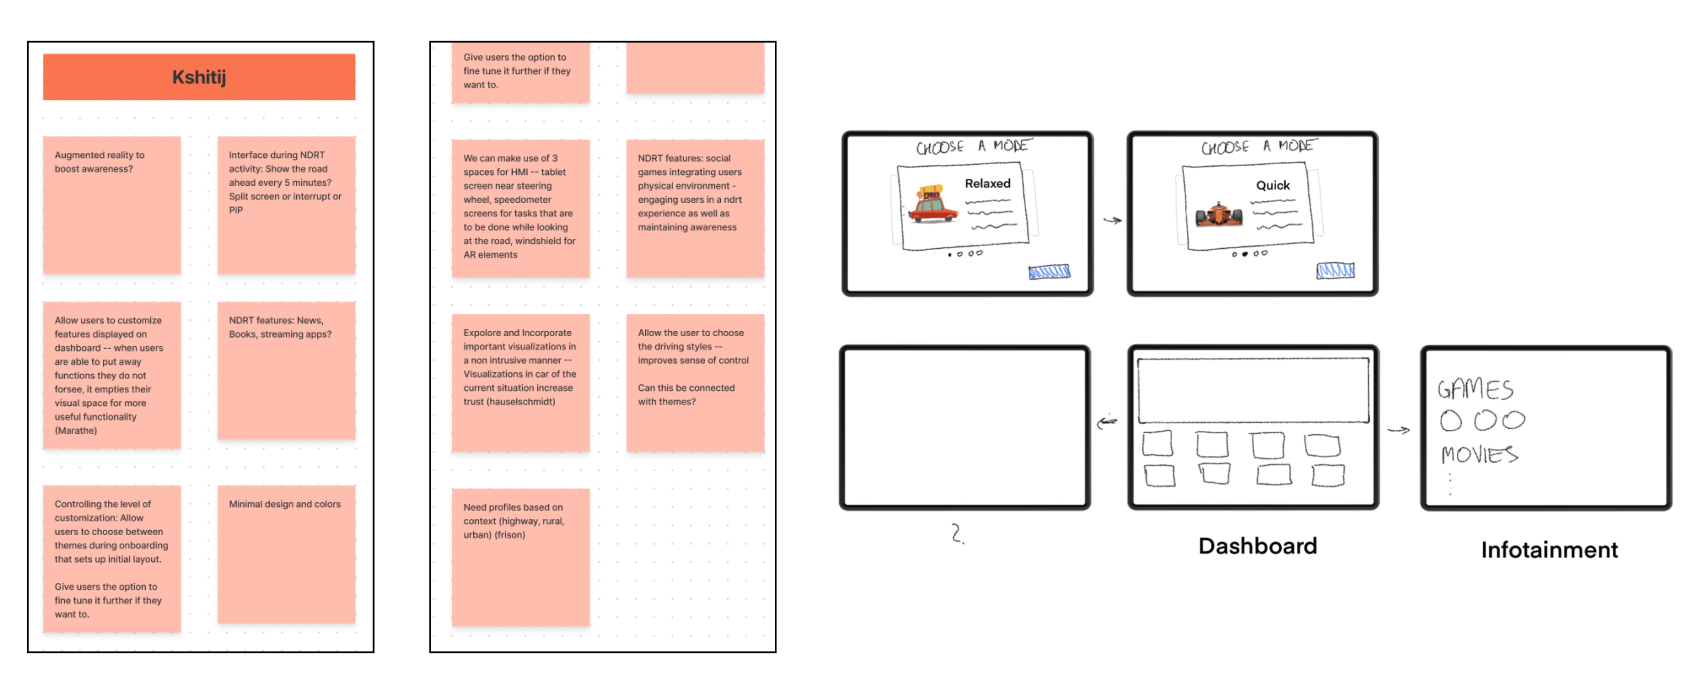
Group Brainstorming:
To give structure to this session, we followed a brainstorming activity we learnt in class.
We first identified 4 overarching themes we would like to focus on. Each board focused on one theme. Each person then took a different colored marker and spent 3 minutes on one board before moving to the next one. When 3 minutes were up, we would shift to the next board and either build on the ideas already listed or enter new ideas.
We followed this activity for 2 rounds.

We then transcribed all ideas onto Miro, and used stickers to vote for the top ideas.

Site Map:
Now that we had a clearer idea about the different features we want to incorporate, we laid out an initial schematic for our design.

Phase 3: Lo-fi Wireframes (In-Progress)
